

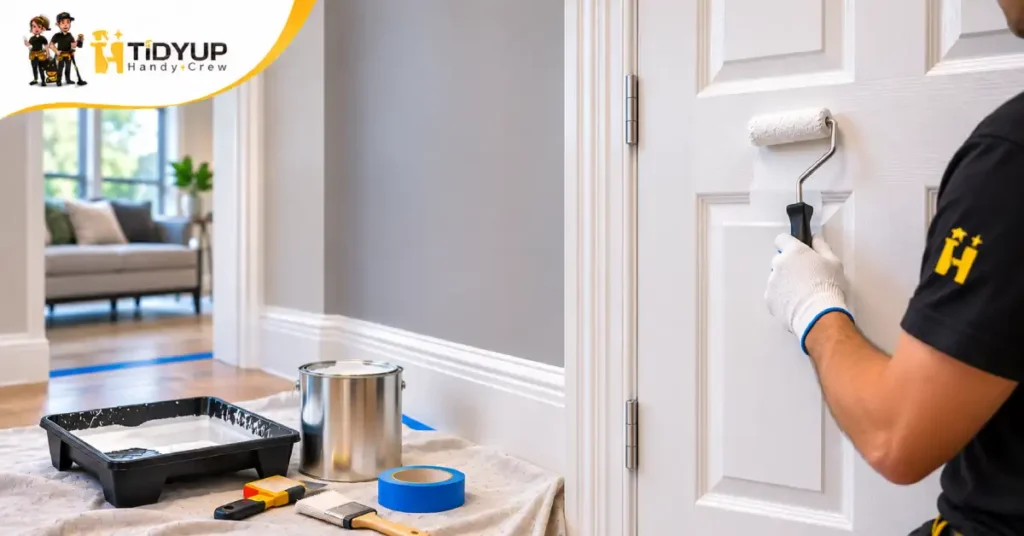
Trim and door painting in Toronto can refresh baseboards, door frames, interior doors, and decorative mouldings without repainting an entire room. The best results usually come from cleaning the surface, repairing small defects, sanding or deglossing where appropriate, priming bare or problem areas, and applying a suitable finish for high-contact trim and doors.
For Toronto homeowners, landlords, and property managers, trim painting is especially useful when baseboards are scuffed, doors look worn, or previous touch-ups no longer match. The right sheen and colour can also affect how easy these surfaces are to maintain.
In older homes, preparation may require extra caution. Health Canada notes that homes built before 1991 may contain lead-based paint and advises against sanding, scraping, or burning suspect coatings without proper assessment.
TidyUp HandyCrew provides house painting and surface finishing services in Toronto for suitable interior projects.
What Does Trim and Door Painting Include?
Trim and door painting is a finishing service for interior woodwork, composite trim, and compatible door surfaces. A typical quotation may include baseboards, door casings, interior door faces, jambs, window trim, and decorative mouldings.
Cleaning, minor filling, sanding where appropriate, priming, and protective masking should be specified rather than assumed.
Hardware removal, repairs, and wall painting may need separate scope.
Which Areas Need Attention First?
Start with high-contact areas: entrances, hallways, and bathroom casings.
Inspect these areas:
- Baseboards: shoe scuffs, vacuum marks, separated joints, and chips.
- Door casings: impact damage near handles and loose corner joints.
- Interior doors: fingerprints, peeling edges, dents, and rubbed areas.
- Window trim: finish wear, condensation marks, or damaged caulking.
- Crown moulding: visible cracks and inconsistent finishes near ceilings.
Investigate moisture damage before painting. For hardware issues, see the handyman services guide.
Trim and Door Painting Toronto: Preparation
Clean, stable surfaces help paint adhere.
- Inspect: Identify material, old finish, moisture, and visible damage.
- Protect: Cover flooring, nearby walls, furnishings, and hardware.
- Clean: Remove suitable dirt and handling residue; let surfaces dry.
- Repair: Fill nail holes and assess gaps using appropriate products.
- Prepare: Lightly abrade compatible sound finishes when needed; control dust.
- Prime: Treat exposed repairs and surfaces requiring adhesion primer.
- Paint: Apply suitable coats and respect product recoat instructions.
- Inspect: Check edges, corners, and contact points after drying.
Benjamin Moore’s trim guidance recommends checking repairs, preparing glossy surfaces, removing dust, and priming repaired areas.
How Are Interior Doors Painted?
Door panels, edges, hinges, and stops complicate painting.
Confirm whether the quote includes both faces, edges, jambs, and casings. Panelled and louvred doors need more detail.
Decide whether doors stay hung or require removal and reinstallation.
Avoid closing painted doors against stops too soon. Follow curing instructions.
Does Trim Material Change the Method?
Yes. Solid wood, medium-density fibreboard (MDF), previously painted metal, and factory-finished doors may need different preparation and compatible primers. Identify the material before buying paint.
Wood trim may show dents, grain, or open joints. MDF trim requires care around damaged edges and exposed material. Metal door components may need an appropriate bonding or corrosion-resistant system. Factory-coated doors can require adhesion checks before recoating.
Ask the painter to identify the substrate, assess any peeling coating, and confirm manufacturer-compatible products. If the material is uncertain, a small test area can help assess appearance and adhesion. Never assume one primer works across every surface or finish.
Which Paint Finish Works Best?
Satin offers softer reflection; semi-gloss reflects more and can emphasize flaws. Choose based on cleaning needs and product suitability.
| Surface | Common finish option | What to consider |
| Hallway baseboards | Satin or semi-gloss | Repeated scuffs and cleaning |
| Interior doors | Satin or semi-gloss | Contact, panels, fingerprints |
| Door casings | Satin or semi-gloss | Consistency with door finish |
| Decorative moulding | Satin or semi-gloss | Detail visibility and glare |
| Older imperfect trim | Softer sheen where suitable | Defects may show under gloss |
Should You Paint or Replace Trim?
Repaint sound trim with cosmetic wear. Consider replacing rotted, swollen, or severely damaged material.
A chipped corner may be repairable. Address active leaks before finishing; paint cannot correct misalignment.
How Should Colours Work Together?
Coordinate trim with walls, floors, and cabinetry. Crisp white contrasts; warmer whites suit some wood tones.
Test daylight and evening samples. Record colour codes and sheen.
If you plan to paint walls as well, the interior painting Toronto guide covers broader room-level decisions. This project can remain trim-only when walls are still in good condition.
Toronto Homes, Condos and Rentals
Older homes may have layered coatings. Condos require access coordination; rentals may need turnover touch-ups.
Across North York, Scarborough, and Etobicoke, inspect materials and access before quoting.
After dusty construction, use our painting-after-renovation guide to plan finishing.
How Much Does Trim and Door Painting Cost?
Toronto pricing depends on trim length, door style, surface condition, primer, and access. Compare quote inclusions.
Use this original quote worksheet to compare like-for-like work:
| Item | Measurement to share | Confirm in quote |
| Baseboards | Approximate linear feet | Prep, paint, protection |
| Door casings | Number of openings and sides | Jambs included? |
| Interior doors | Door count, style, faces | Edges and hardware? |
| Repairs | Photos of chips or gaps | Filler, primer, replacement? |
| Finishing | Colour and sheen | Coats, return visits, cleanup? |
Measure trim lengths and count door faces. Send photos for an accurate scope. For wider budgeting context, see the Toronto interior painting cost guide.
How Long Does the Work Take?
Timing depends on repairs, doors, coats, and drying conditions. Confirm recoat intervals and safe handling times.
How to Prepare Before Painters Arrive
- Photograph door faces, frames, baseboards, and damaged areas.
- Identify sticking doors or loose trim before quoting.
- Count doors and note whether both faces need paint.
- Measure approximate baseboard runs and decorative moulding.
- Share existing paint codes or desired finish samples.
- Clear small belongings, shoes, and hallway obstacles.
- Confirm parking, condo access, furniture protection, and cleanup.
- Ask about paint curing before regular door use.
Common Trim Painting Mistakes
Avoid painting dirty or loose coatings, ignoring moisture, or closing doors before curing.
In older homes, suspect lead coatings require special care. Health Canada warns against sanding or scraping lead-based paint because it can release harmful dust. Arrange appropriate assessment instead.
Book Trim and Door Painting Toronto
TidyUp HandyCrew helps Toronto homeowners and landlords plan trim, casing, and interior door painting.
Send photos, door counts, trim lengths, and colours. Request a trim and door painting quote to confirm preparation, paint coverage, timing, and price.
Trim and door painting in Toronto refreshes baseboards, casings, mouldings, and doors when surfaces are sound and properly prepared. Choose a suitable finish, identify repairs, measure the work, and allow proper curing. A detailed quote keeps small finishing projects clear and manageable.
Trim and Door Painting FAQs
Q1: Can I Paint Trim Without Painting Walls?
Yes. Painting baseboards, casings, and doors can refresh visible details while leaving sound wall paint untouched. Protect the adjoining walls and floors, and coordinate colours carefully. Existing wall paint may have faded, so test sample colours before committing to a contrasting finish.
Q2: Should Doors Match Their Frames?
They do not have to match. Matching doors and casings creates a consistent look, while contrasting colours can highlight a doorway. Compare samples under the room’s actual lighting. Record the colour and sheen of both finishes so future touch-ups remain easier to plan.
Q3: Is Satin or Semi-Gloss Better?
Both can work for interior trim and doors. Satin generally has a softer appearance, while semi-gloss is more reflective. The best choice depends on surface condition, cleaning needs, and product compatibility. Ask for a sample where glare or visible defects may matter.
Q4: Should Doors Be Removed for Painting?
Not always. Some doors can be painted in place, while others benefit from removal for access and finishing. The decision depends on hardware, panel design, available space, and coating instructions. Confirm removal, protection, and reinstallation in the written quote rather than assuming they’re included.
Q5: How Much Does Door Painting Cost?
Cost depends on the number and style of doors, whether both faces and edges are included, preparation, paint products, and repair needs. A flat door may involve less detail than a louvred or panelled design. Request an itemized quote before comparing contractors.
Q6: How Soon Can Painted Doors Close?
Follow the coating manufacturer’s drying, recoat, and cure instructions. A surface can feel dry before it resists sticking or scuffing. Temperature, humidity, and paint type affect timing. Avoid heavy handling, cleaning, or prolonged contact with door stops until the finish is ready.
