

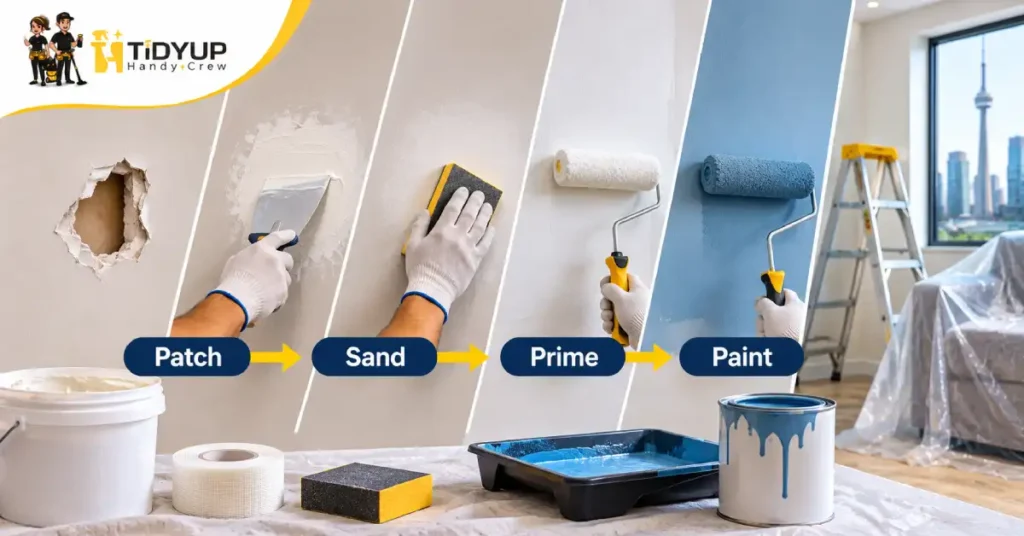
Drywall repair and painting in Toronto restores damaged interior walls by fixing holes or cracks, smoothing the patch, applying primer, and repainting the affected surface. The correct sequence is patch, sand, prime, then paint, with drying and dust removal between stages. Painting alone cannot hide an unstable repair.
Health Canada’s 2022 renovation guidance warns that homes built before 1991 may contain lead-based paint. WorkSafeBC’s 2024 drywall guidance also identifies sanding dust as a possible exposure. These checks matter before disturbing older surfaces.
TidyUp HandyCrew offers house painting and surface finishing services in Toronto for suitable projects. This guide helps Toronto homeowners, condo residents, landlords, and property managers assess damage, compare repair options, and request an accurate quote. It covers small holes, damaged corners, ceiling patches, paint matching, costs, and scheduling.
What Does Drywall Repair Include?
Drywall repair is the process of restoring damaged gypsum-board walls or ceilings before finishing. It can involve removing loose material, installing a supported patch, taping seams, applying joint compound, sanding, priming, and painting. The exact work depends on damage size, wall condition, texture, and the desired finished appearance.
A quote should identify patching and paint coverage. For other fixes, see TidyUp’s Toronto handyman services guide.
Drywall Repair and Painting Toronto Process
Four stages connect the repair to its final finish. Larger openings or textured ceilings may need additional work.
1. Patch the Damaged Area
Identify the cause first. Small holes may need filler; larger openings need backing or new board. Assess loose tape, corner damage, and repeated cracks. Feather compatible compound beyond the patch.
Do not cover active moisture. Investigate leaks or movement first.
2. Sand and Control Dust
After drying, smooth ridges without damaging drywall paper. Angled light reveals uneven patches. Use dust extraction and clean before priming.
WorkSafeBC recommends vacuum capture over dry sweeping. Suspect older materials need assessment before sanding.
3. Prime the Repair
Primer seals porous compound. Without it, uneven absorption can cause flashing. Choose a compatible primer.
For stains, resolve moisture first, then assess stain-blocking preparation. The painting-after-renovation guide covers broader finishing preparation.
4. Paint and Inspect
After priming, match colour, sheen, and texture where practical. Inspect dry paint in normal and angled light.
On faded walls, corner-to-corner repainting may look more consistent. Exact matching is not guaranteed.
Which Drywall Damage Needs Repair?
Repair choice depends on material stability. Use this comparison when describing damage.
| Damage | Likely approach | Painting consideration |
| Nail holes or small dents | Surface filler and smoothing | Spot prime and touch-up |
| Doorknob or anchor hole | Supported patch if needed | Blend or repaint wall |
| Failed joint tape or crack | Investigate movement, retape | Check for repeat cracking |
| Damaged corner bead | Repair or replace affected edge | Match adjacent finish |
| Ceiling stain or soft board | Diagnose moisture; assess replacement | Prime only after cause resolves |
| Large cut-out | New board, backing, seam finishing | Wider repaint area possible |
Recurring cracks or wet ceilings need assessment.
Why Do Drywall Cracks Return?
Cracks recur when joint failure, movement, or moisture remains unresolved. A contractor should assess tape, framing, and board condition.
Photograph widening cracks. Seek structural advice for significant movement. Check whether the quote includes reinforcing tape.
Will a Painted Drywall Patch Show?
Texture, colour, and sheen differences can reveal patches. Fading and side lighting make matching harder.
Choose spot or full-wall painting based on age, lighting, and desired appearance. Specify the boundary in writing. See the Toronto painting services guide.
How Do You Inspect the Finish?
Inspect dry paint in normal and angled light for ridges, pinholes, texture, or sheen differences. Compare against the agreed finish standard.
Photograph finished rental repairs. Before more painting, check whether the issue is patch shape, primer, or paint matching.
How Long Does Patch-and-Paint Take?
Timing depends on damage, compound, drying conditions, access, and paint instructions. Even small repairs may need another visit.
Separate working time from drying time when planning condo access or rental turnover.
What Does Drywall Repair Cost?
Toronto repair pricing depends on patch size, quantity, ceiling access, materials, texture, and repaint scope. Quotes vary by inclusion.
Use this original quote comparison template when reviewing estimates:
| Quote item | Contractor A | Contractor B |
| Patching and replacement board | Included? | Included? |
| Sanding, primer, and paint | Included? | Included? |
| Spot paint or entire wall | Which? | Which? |
| Furniture protection and cleanup | Included? | Included? |
| Materials, taxes, return visits | Specified? | Specified? |
Compare scopes, not headline prices. Confirm whether paint is supplied by you or the contractor, whether return visits are included, and who moves furniture. These differences can matter more than the patch size itself. See the house painting cost guide for Toronto for broader painting budgets.
Which Repair Scope Should You Book?
Choose patch-only if painting is separate; spot paint for suitable matching; or full-wall painting for visible differences.
Ceilings and extensive damage need assessment. Repair size alone does not determine paint coverage.
Toronto Homes, Condos and Rentals
Older Toronto houses may have plaster; condos may require elevator bookings and restricted hours. Rentals often have multiple anchor holes.
Flag plaster, ceiling height, furniture, and access. Confirm availability for North York, Scarborough, Etobicoke, and downtown Toronto.
When Should You Avoid Sanding?
Assess suspect lead, asbestos, or moisture damage before disturbance. Health Canada’s lead-based paint guidance warns against sanding such coatings.
Soft drywall, mould, or recurring stains need qualified assessment before patching.
Prepare for a Drywall Repair Visit
- Photograph damage and its location.
- Estimate patch sizes and quantities.
- Flag recurring damage.
- Mention leaks or suspect coatings.
- Identify colour, sheen, and leftover paint.
- Clear breakables and protect furniture.
- Share access and work hours.
- Confirm primer, repaint area, and cleanup.
- Ask about specialists and return visits.
- Request a written scope.
Common Patch-and-Paint Mistakes
Rushing drying, over-sanding, skipping primer, or ignoring sheen can expose repairs. Larger holes may require backing.
Assess older coatings before sanding. Agree on a realistic finish standard.
Book Drywall Repair and Painting Toronto
TidyUp HandyCrew discusses wall patching and finishing with Toronto property owners. Share photos, access details, and finish expectations.
Request a drywall repair and painting quote and clarify patching, priming, paint coverage, and cleanup before booking.
Drywall repair and painting in Toronto follows patch, sand, prime, paint. Assess damage, control dust, respect drying times, and agree on paint coverage. For a clearer quote, share photos, describe recurring problems, and choose the finish standard before scheduling.
Drywall Repair and Painting FAQs
Q1: Can You Paint Immediately After Patching?
No. Let joint compound dry according to its product instructions, then sand and remove dust. Prime the repaired surface before painting. The total waiting period depends on compound type, coat thickness, temperature, and humidity. A dry-looking surface is not always fully ready for paint.
Q2: Do All Drywall Holes Need New Board?
No. Small nail holes and minor dents may need only filler. Wider openings often require supporting material or replacement drywall. The right method depends on size and stability. Crumbling edges or recurring cracks require inspection before a cosmetic repair is selected.
Q3: Should You Prime a Drywall Patch?
Yes, priming is normally advisable over bare joint compound and exposed drywall. These materials can absorb topcoat differently from painted walls. A compatible primer helps reduce patchiness and improves finish uniformity. Stained or damaged surfaces may need separate preparation before priming.
Q4: Can You Match Existing Wall Paint?
Matching may be possible, but exact results are not guaranteed. Existing paint can fade or change sheen over time. Texture and lighting also affect appearance. Ask whether the quote includes spot painting, blending, or repainting the full wall for a more consistent finish.
Q5: How Much Does Repair and Painting Cost?
Prices depend on damage size, number of patches, location, finish quality, materials, and paint area. Ceiling access and multiple compound coats can increase labour. Request an itemized estimate identifying patching, sanding, primer, paint, cleanup, and return visits rather than relying on a generic price.
Q6: When Is Drywall Repair Not Enough?
Drywall repair alone is insufficient when leaks remain active, mould is suspected, materials contain hazards, or cracking suggests continuing movement. Those issues need appropriate assessment and repair first. Once the underlying cause is resolved, wall restoration and painting can be scoped separately.
