

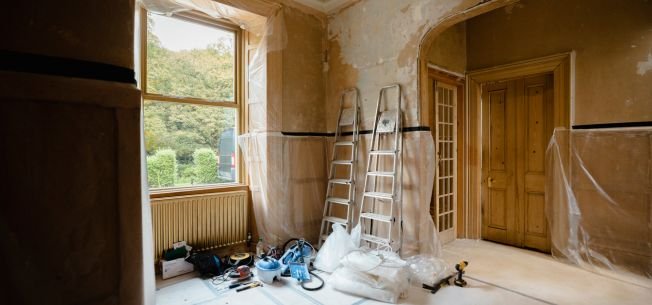
Post-renovation dust cleaning in Toronto works best when loose debris is removed first, high surfaces are cleaned before lower ones, dry dust is vacuumed before wet wiping, and floors are mopped last. Fine dust from drywall, sanding, flooring, tile, drilling, cutting, and painting preparation can settle far beyond the visible work area.
In Toronto condos, apartments, townhouses, detached homes, older houses, and rental properties, renovation dust can also move through hallways, vents, foot traffic, and open doorways. That is why cleaning after renovation often needs more detail than routine household cleaning.
TidyUp HandyCrew provides post-renovation and construction cleaning services in Toronto for homes that need detailed dust and surface cleaning after renovation work.
Key Takeaways
- Remove loose debris before detailed dust cleaning.
- Clean from high surfaces downward.
- Vacuum loose renovation dust before wiping or mopping.
- Check vents, trim, cabinet tops, baseboards, tracks, ledges, and floor edges.
- Wait until sanding, cutting, drilling, and other dusty work is finished.
- Consider professional cleaning when fine dust affects several rooms or a move-in deadline is close.
Why Fine Dust After Renovation Is Hard to Remove
Renovation dust is different from ordinary household dust. Drywall sanding, flooring installation, tile work, drilling, cutting, demolition, and wall preparation can create fine particles that spread quickly and settle in less obvious places.
Dust may remain on vents, cabinet tops, baseboards, window tracks, closet shelves, trim, appliance surfaces, and floor edges. One cleaning pass may remove the visible layer without reaching those areas.
Air movement and contractor touch-ups can also disturb particles after a room looks clean. This is why cleaning order matters and why a final recheck is useful.
Quick Answer: How Do You Remove Fine Dust After Renovation?
The best approach is to clean from top to bottom and remove loose particles before introducing much moisture.
- Remove loose debris and packaging.
- Confirm dusty renovation work is complete.
- Dust high surfaces, ledges, vents, and trim.
- Vacuum floors, edges, and corners carefully.
- Wipe hard surfaces with a suitable microfiber cloth.
- Mop floors last and recheck once dust settles.
Avoid mopping too early. Fine construction dust can mix with water and leave streaks, muddy residue, or a thin paste that takes more effort to remove.
Why Does Renovation Dust Keep Coming Back?
Renovation dust often returns because particles remain in areas that are easy to miss. Air movement, walking through the space, and final contractor work can bring that residue back onto finished surfaces.
Common sources include vents, grilles, cabinet tops, baseboard edges, trim, window tracks, floor corners, closet shelves, and door frames. Drywall dust can also remain on upper surfaces and later settle again when heating or cooling systems run.
Renovation Dust vs. Regular Household Dust
| Category | Regular Household Dust | Renovation Dust |
| Main source | Daily living, fabrics, pets, shoes, outdoor air | Drywall, sanding, flooring, cutting, drilling, tile, paint prep |
| Texture | Light and fluffy | Fine, powdery, gritty, or chalky |
| Common areas | Furniture, shelves, floors | Vents, trim, cabinets, ledges, baseboards, corners |
| Cleaning approach | Dust, vacuum, mop | Debris removal, top-down dusting, vacuuming, wiping, then mopping |
| Professional help | Heavy buildup or limited time | Multi-room dust, drywall dust, move-in deadlines |
Regular cleaning focuses on everyday buildup. Post-renovation dust cleaning targets fine particles and residue left by construction and home improvement work.
Common Sources of Fine Dust After Renovation
Drywall Sanding Dust
Drywall sanding creates very fine powder that can travel beyond the immediate work zone. Check floors, vents, shelves, baseboards, trim, windowsills, door frames, and nearby rooms.
Flooring Installation Dust
Flooring work can leave sawdust, cutting residue, footprints, and dust along floor edges. Hallways, stairs, and entryways may also collect residue from workers carrying tools and materials.
Painting Preparation Dust
Sanding, wall patching, scraping, and trim preparation can leave dust on floors, doors, windowsills, counters, baseboards, and switches.
Kitchen and Bathroom Renovation Dust
Kitchen and bathroom projects can leave residue on cabinet fronts and tops, counters, appliance exteriors, vanities, fixtures, backsplashes, floors, tile ledges, mirrors, baseboards, and fan covers.
General Construction Residue
Renovation cleanup can also involve packaging, footprints, small debris, adhesive residue, material offcuts, and protective coverings.
Best Cleaning Order for Post-Renovation Dust
1. Remove Loose Debris
Clear packaging, scraps, and other loose material that can be safely removed. Confirm contractors have finished dust-producing work.
2. Dust High Surfaces
Start with shelves, cabinet tops, upper trim, ledges, and other elevated surfaces so falling dust does not contaminate finished areas.
3. Clean Vents and Detailed Areas
Check grilles, baseboards, door frames, window ledges, trim, and other narrow dust-catching areas.
4. Vacuum Carefully
Vacuum floors, edges, and corners before wet cleaning. A HEPA-filter vacuum may help reduce redistribution of fine particles when used correctly.
5. Wipe Hard Surfaces
Use suitable microfiber cloths and surface-safe methods for counters, cabinets, doors, fixtures, and other hard surfaces.
6. Mop Floors Last
Once loose dust has been collected, finish with the appropriate floor-cleaning method. Avoid over-wetting moisture-sensitive surfaces.
7. Recheck After Dust Settles
Inspect flat surfaces, vents, trim, corners, and floors again. Fine particles may still appear after the first pass.
Room-by-Room Renovation Dust Priorities
Different rooms collect dust in different places.
Kitchen: counters, cabinets, appliance exteriors, backsplash, baseboards, floors, and windowsills.
Bathroom: vanity, fixtures, fan cover, tile ledges, baseboards, and floors.
Living rooms and bedrooms: baseboards, door frames, windowsills, closet shelves, floors, and trim.
Hallways, stairs, and entryways: railings, floors, door frames, baseboards, and high-touch surfaces.
For a complete room-by-room version, use our post-renovation deep cleaning checklist for Toronto homes.
Post-Renovation Dust Cleaning in Toronto Condos and Apartments
Toronto condos and apartments need extra planning because building access can affect the cleaning schedule. Elevator reservations, loading areas, parking, concierge instructions, work-hour limits, shared hallways, and garbage rules may all matter.
Before booking, confirm elevator access, parking, contractor completion time, garbage rules, and any move-in or handover deadline.
If cleaning must be completed before a tenant handover or vacant-unit, move-in and move-out cleaning services in Toronto may also be relevant.
Post-Renovation Dust Cleaning for Landlords and Property Managers
Landlords and property managers may need dust cleaning after repairs, painting, flooring, or renovation between occupants. Schedule the final clean after dusty contractor work is complete and before photos, showings, staging, or tenant move-in.
DIY Dust Cleaning vs. Professional Post-Renovation Cleaning
DIY cleaning may work when only one small area was repaired, dust is light, surfaces are easy to reach, and there is no immediate move-in deadline.
Professional cleaning may make more sense when:
- Fine dust covers several rooms
- Drywall sanding created widespread residue
- Flooring work affected multiple areas
- A kitchen or bathroom renovation just finished
- Dust keeps returning
- A rental turnover is approaching
- You are moving in soon
- Detailed cleaning is needed before photos or handover
Quick Dust-Severity Check Before Booking
| Dust Level | What You See | Likely Cleaning Need |
| Light | One room, small repair, limited residue | DIY or targeted cleaning may be enough |
| Moderate | Several surfaces, trim, floor edges, or vents affected | Detailed room cleaning |
| Heavy | Fine dust across several rooms or drywall residue | Professional post-renovation cleaning may be practical |
| Construction-heavy | Debris, adhesive, paint splatter, or leftover materials | Confirm separate post-construction needs |
What Regular Cleaning May Miss After Renovation
Routine house cleaning focuses on everyday dirt. Renovation dust can require additional attention around vent covers, high ledges, baseboard tops, trim, cabinet tops, window tracks, floor edges, door frames, and repeated dust-removal passes.
If the home also has older household buildup, kitchen grease, bathroom residue, or neglected areas beyond the renovation zone, house deep cleaning services in Toronto may suit the wider property.
What May Require Add-Ons or Separate Services?
Some tasks may need extra time, special tools, or a separate provider, including large construction debris, junk removal, heavy adhesive residue, significant paint splatter, inside cabinet or appliance cleaning, carpet cleaning, upholstery cleaning, duct or HVAC cleaning, mould remediation, hazardous material removal, high exterior windows, or exterior cleanup.
Tell the cleaning company what work was completed and what remains. Photos can help clarify the scope.
For heavier construction mess, see our post-construction cleaning cost guide for Toronto.
How to Prepare Before Booking Post-Renovation Dust Cleaning
Before booking:
- Confirm dusty renovation work is complete
- List the rooms affected
- Identify drywall, flooring, tile, painting, kitchen, or bathroom work
- Ask contractors to remove tools and large debris
- Keep floors accessible
- Note vents, cabinets, trim, and dust-heavy areas
- Decide whether inside cabinets or appliances are needed
- Share parking, elevator, or concierge instructions
- Secure pets and valuables
- Share move-in, showing, or handover deadlines
Photos of the affected rooms can help explain the scope before the cleaning team arrives.
How Long Does Post-Renovation Dust Cleaning Take?
There is no single cleaning time for every renovation. Duration depends on property size, renovation type, dust level, rooms affected, access, and requested add-ons.
A small repair may take a few hours, while multi-room renovations can take longer. Heavy drywall dust, cabinet cleaning, difficult access, and repeated passes can extend the visit.
How Much Does Post-Renovation Dust Cleaning Cost in Toronto?
Post-renovation dust cleaning cost in Toronto depends on property size, dust level, renovation type, affected rooms, floor area, access, and requested services.
Other factors include drywall or flooring work, kitchen and bathroom detailing, vents, baseboards, cabinet add-ons, parking, condo requirements, urgency, and remaining debris.
A lightly renovated condo will need a different cleaning scope from a detached home with several rooms affected by construction work. For pricing guidance, read our post-renovation cleaning cost guide for Toronto.
Common Mistakes When Cleaning Fine Dust
Avoid cleaning before contractors finish, mopping before loose dust is removed, using too much water, forgetting vents and grilles, skipping trim and baseboards, moving furniture back too early, or cleaning only visible surfaces.
Wait until dusty work is complete, clean from high surfaces downward, and wash floors only after loose particles are removed.
Book Post-Renovation Dust Cleaning in Toronto
Fine dust after renovation can settle beyond the original work area. A detailed clean can address floors, cabinets, counters, trim, baseboards, vents, windowsills, fixtures, and other surfaces in the agreed scope.
TidyUp HandyCrew provides post-renovation and construction cleaning services in Toronto for condos, townhouses, detached homes, and rental properties.
Ready to discuss your space? Request a post-renovation cleaning quote and share the rooms renovated, dust level, access details, and preferred cleaning date.
Frequently Asked Questions About Post-Renovation Dust Cleaning
Why does renovation dust keep coming back?
Fine particles can remain on vents, cabinet tops, baseboards, trim, tracks, ledges, and floor edges. Air movement, foot traffic, or contractor touch-ups can disturb that residue and spread it onto cleaned surfaces again.
What is the best way to remove fine dust after renovation?
Remove loose debris first, then work from high surfaces downward. Clean vents and ledges, vacuum floors and edges, wipe hard surfaces, and mop floors last. Recheck after remaining particles have had time to settle.
Should you vacuum or mop renovation dust first?
Vacuum first. Mopping loose renovation dust can mix fine particles with water and leave streaks or muddy residue. After vacuuming and wiping, use the appropriate mopping method for the floor type.
Is post-renovation cleaning different from regular house cleaning?
Yes. Regular cleaning focuses mainly on everyday dirt and buildup. Post-renovation cleaning targets fine dust and residue from drywall sanding, flooring, drilling, tile work, painting preparation, and other renovation activity.
How much does post-renovation dust cleaning cost in Toronto?
Pricing depends on property size, dust level, renovation type, affected rooms, floor area, bathrooms, vents, cabinets, access, parking, condo requirements, urgency, and add-ons. A project-specific quote is more useful than one fixed price.
When should post-renovation cleaning be booked?
Book detailed cleaning after sanding, cutting, drilling, painting preparation, and other dust-producing work is complete. Ideally, the final clean happens before furniture, tenants, staging items, or personal belongings are moved back in.
